Unity SDK example scenes
The SDK includes sample scenes that demonstrate how to use the SDK. To open the scenes, install the SDK and in the Project panel, expand TezosSDK > Examples. The examples are in individual folders.
Before using any of the scenes, install a Tezos-compatible wallet on a mobile device that has a camera and can scan QR codes and get some test tez tokens that you can use to pay transaction fees. For instructions, see Installing and funding a wallet.
WalletConnection scene
This scene shows how to connect to a user's wallet and get information about their account.
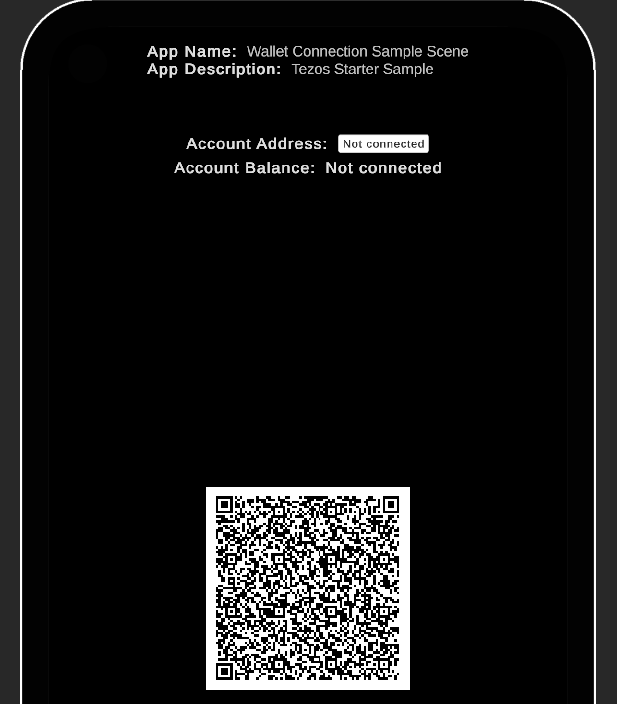
The scene uses the platform type to determine how to connect to a user's wallet.
In the SetPlatformFlags function, it checks what platform it is running on:
private void SetPlatformFlags()
{
    _isMobile = Application.platform == RuntimePlatform.IPhonePlayer || Application.platform == RuntimePlatform.Android;
    _isWebGL = Application.platform == RuntimePlatform.WebGLPlayer;

    // ...
}
Then based on the platform, it shows different buttons for different connection types:
// Activate deepLinkButton when on mobile or WebGL, but not authenticated
deepLinkButton.SetActive(_isMobile || _isWebGL);

// Activate socialLoginButton only when on WebGL and not authenticated
socialLoginButton.SetActive(_isWebGL);

// Activate qrCodePanel only on standalone and not authenticated
qrCodePanel.SetActive(!_isMobile && !_isWebGL);
These buttons correspond to the ways that the SDK can connect to wallets:
- For mobile and WebGL platforms, the scene shows a button that links directly to a wallet app, such as a browser plugin or mobile app
- For WebGL platforms, the scene shows a button that links to social wallets, such as Kukai
- For standalone platforms, the scene shows a QR code that you can scan in any Tezos-compatible wallet app
The buttons call the Wallet.Connect() method with the walletProvider parameter set to WalletProviderType.beacon for the direct links or QR code connections and the walletProvider parameter set to WalletProviderType.kukai for the social wallet connections.
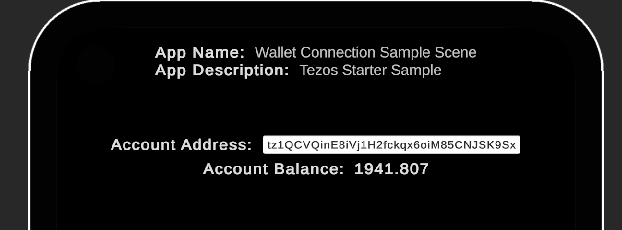
After the user approves the connection in the wallet, the scene shows the address of the connected account and its balance, as in the following picture. At the bottom of the scene there is a logout button that closes the connection.
Contract scene
This scene shows how to deploy a smart contract to Tezos and create tokens with it.
A smart contract is a program stored on the blockchain. Smart contracts can do many things, but the main thing that game developers use them for is to manage tokens, which are assets that are stored on Tezos. In this case, the smart contract keeps track of tokens, their metadata, and who owns them.
The SDK comes with a sample smart contract that allows a Unity project to create tokens. You can customize these tokens, give them to users, and treat them like the players' in-game inventories.
Like the WalletConnection scene, you must first connect to a wallet. Then the scene shows the address of the connected account and enables the "Deploy Contract" and "Mint Token" buttons:
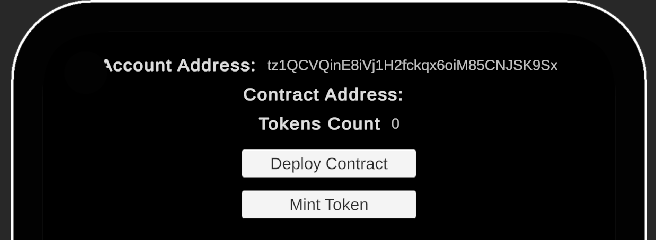
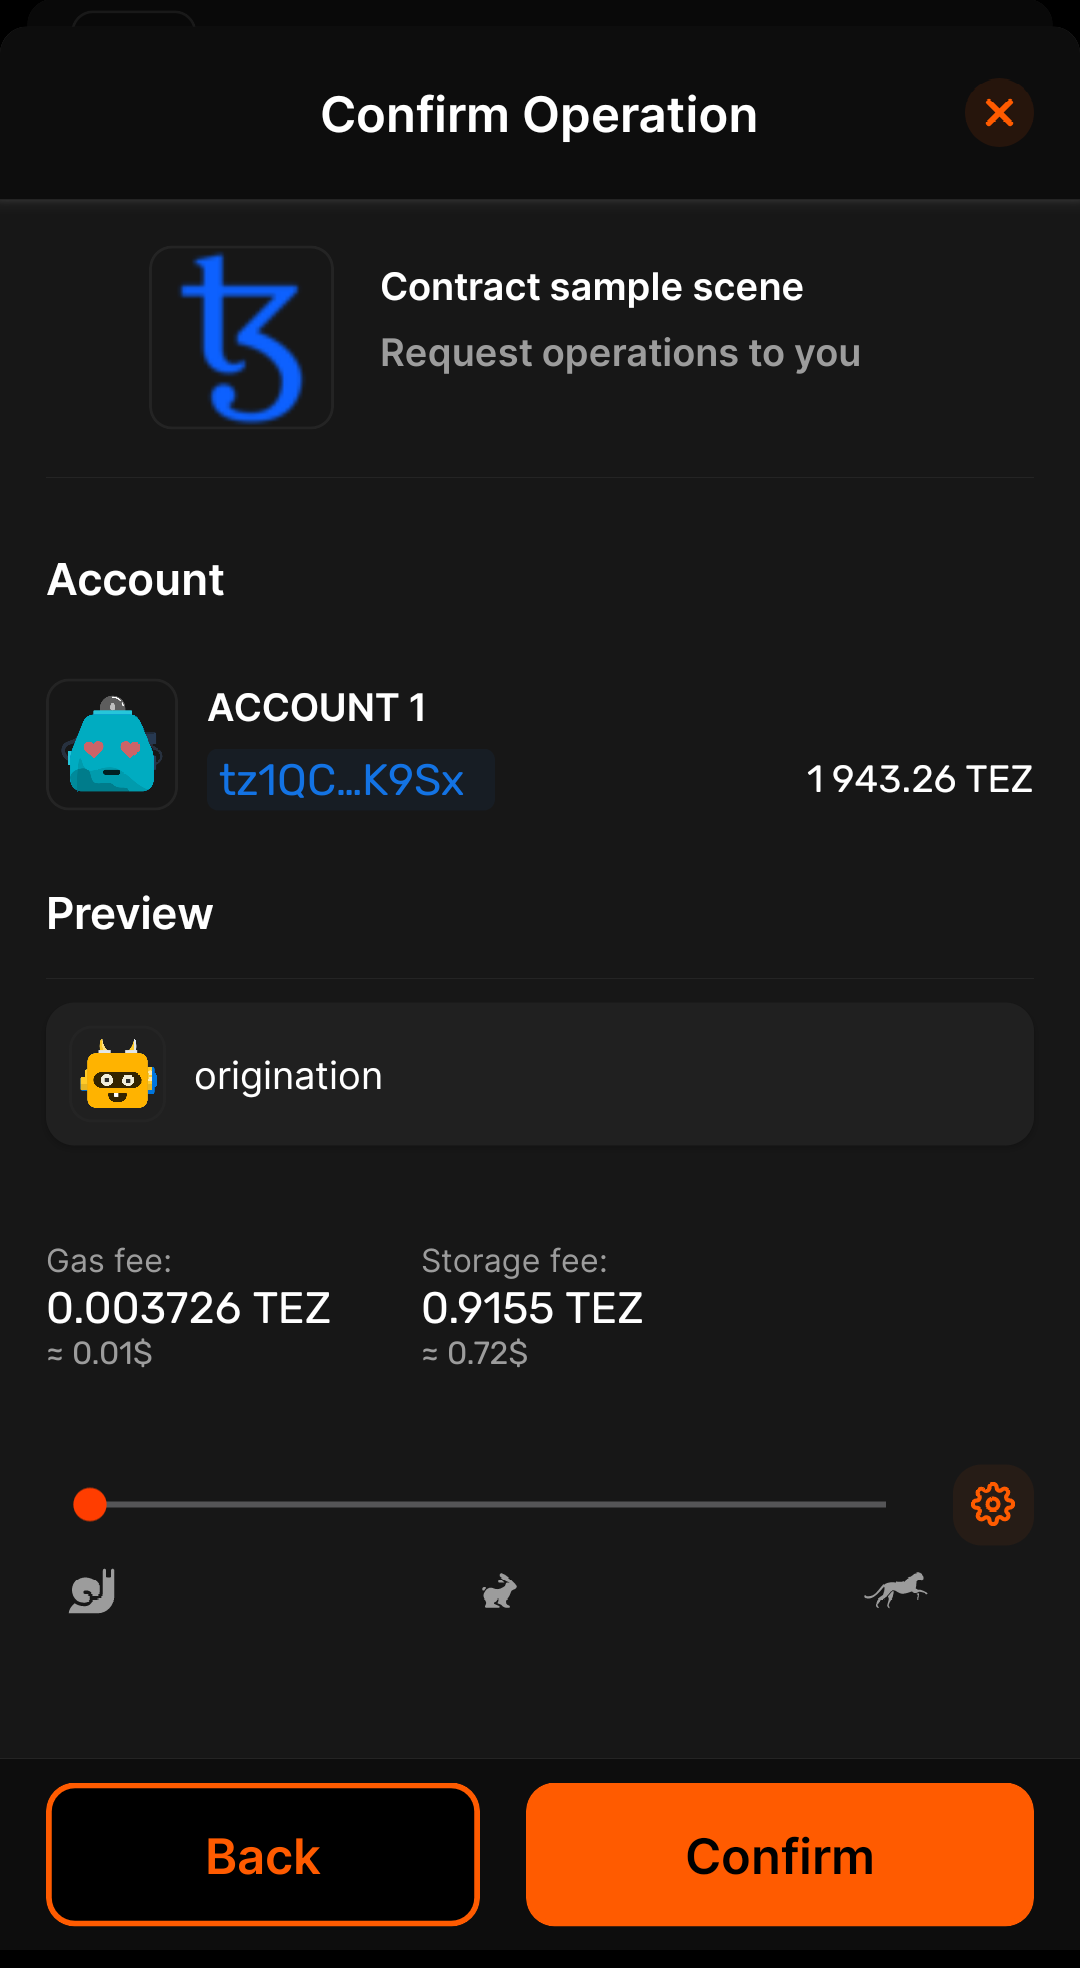
When you click "Deploy Contract," your connected wallet prompts you to confirm the transaction and pay the transaction fees. Because you are connected to the test network, these are worthless testnet tokens and not real currency. This process can take some time.
The scene runs the HandleDeploy function in the TezosSDK/Examples/Contract/Scripts/DeployContract.cs file, which calls the TokenContract.Deploy method to deploy the contract to Tezos:
public void HandleDeploy()
{
    TezosManager.Instance.Tezos.TokenContract.Deploy(OnContractDeployed);
}

private void OnContractDeployed(string contractAddress)
{
    contractAddressText.text = contractAddress;
    tokensCountText.text = "0";
}
When you confirm the transaction in the wallet app, you must wait for the contract to be deployed on Tezos.
The log in the Console panel shows a message that looks like Received operation with hash oopFjLYGTbZTEFsTh4p1YPnHR1Up1SNnvE5xk2SRaGH6PZ4ry56, which is the address of the Tezos operation that deployed the contract.
This process can take a few minutes.
For example, this is what the transaction looks like in the Temple wallet:
When the contract is deployed, the project updates to show the address of the contract, which starts with KT1.
You can get the address by opening the Scene panel, selecting the Address object in the Hierarchy panel, and copying the address from the Inspector panel.
To see information about the deployed contract, copy this address and put it into a block explorer such as Better Call Dev.
The block explorer shows information about the contract, including recent transactions, its source code, and the tokens it controls and their owners. Currently, the block explorer shows only the origination transaction, which deployed the contract:
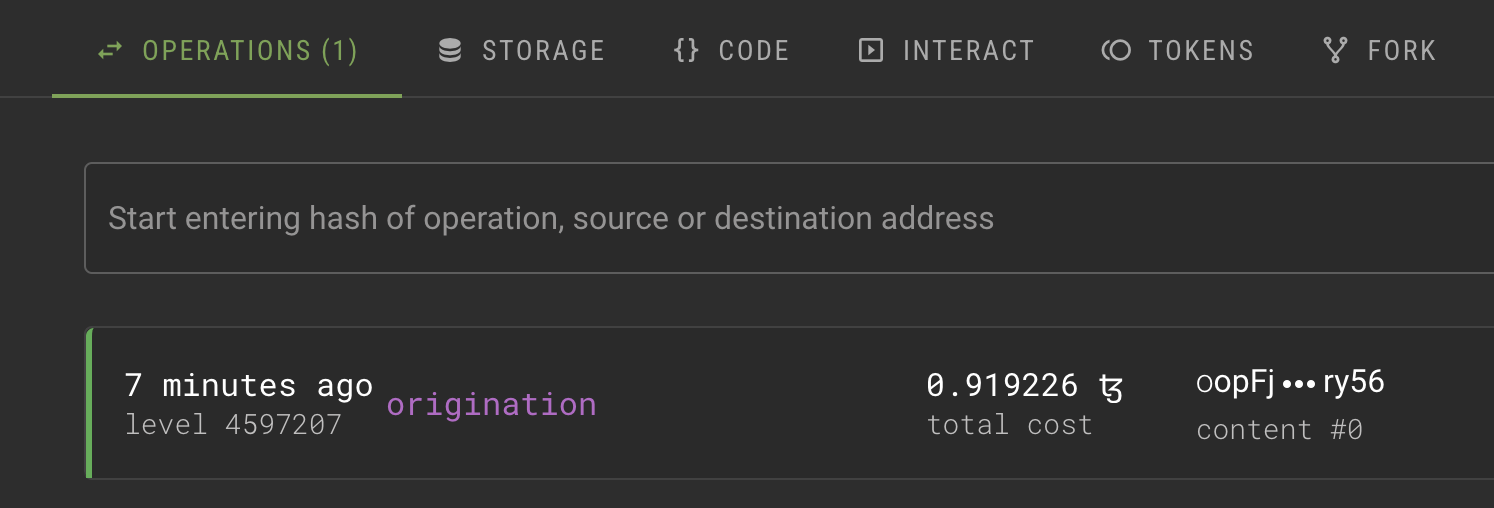
Now you can go back to the Simulation panel in the Unity Editor and click "Mint Token." The project gets approval in your wallet and then sends a transaction to the smart contract to create (mint) a token. Like the deployment operation, it can take time for the transaction to complete and be confirmed on Tezos.
When the mint transaction is complete, the "Tokens Count" text in the scene updates to show the number of token types that have been minted with this contract. The mint process creates a random number of tokens with this type. Your tokens can have a quantity of 1 to make them unique or a larger quantity to represent an amount of something.
You can also see the mint transaction on the block explorer. Because the contract follows the FA2 standard for tokens, the block explorer also shows the tokens and information about them, as in this picture:
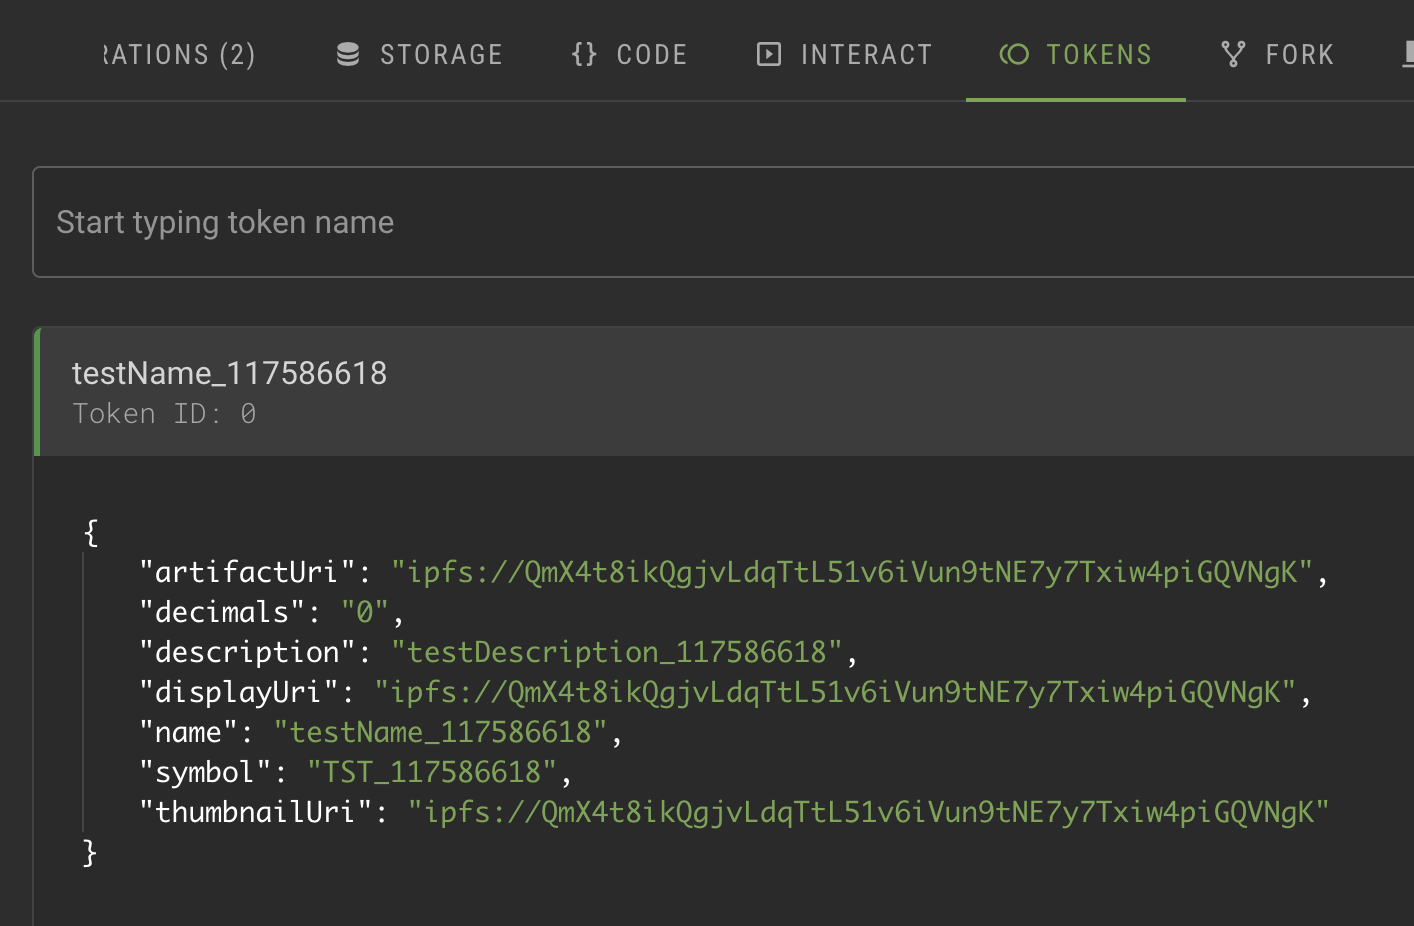
The tokens that this scene creates have randomly generated metadata.
To change the metadata, open the TezosSDK/Examples/Contract/Scripts/MintToken.cs file.
The file's HandleMint function creates the token by generating random numbers, creating a metadata object for the token, and using the TokenContract.Mint method to send the mint transaction to the contract:
public void HandleMint()
{
    var rnd = new Random();
    var randomInt = rnd.Next(1, int.MaxValue);
    var randomAmount = rnd.Next(1, 1024);

    var destinationAddress = TezosManager
        .Instance
        .Wallet
        .GetActiveAddress();

    const string imageAddress = "ipfs://QmX4t8ikQgjvLdqTtL51v6iVun9tNE7y7Txiw4piGQVNgK";

    var tokenMetadata = new TokenMetadata
    {
        Name = $"testName_{randomInt}",
        Description = $"testDescription_{randomInt}",
        Symbol = $"TST_{randomInt}",
        Decimals = "0",
        DisplayUri = imageAddress,
        ArtifactUri = imageAddress,
        ThumbnailUri = imageAddress
    };

    TezosManager
        .Instance
        .Tezos
        .TokenContract
        .Mint(
            completedCallback: OnTokenMinted,
            tokenMetadata: tokenMetadata,
            destination: destinationAddress,
            amount: randomAmount);
}
In your projects, you can set the metadata to store information about what the token represents. For more information about creating tokens with Tezos, see Tokens and the tutorials Create an NFT and Build an NFT marketplace.
Transfer scene
This scene shows how to transfer tokens between accounts.
Like the WalletConnection scene, you must first connect to a wallet. By default, the scene uses the contract that you deployed with the Contract scene. It also shows the IDs of the tokens that you created with that contract, starting with 0.
To transfer a token, make sure that the scene shows the address of the contract. Then, fill in the fields and click the Transfer button. The scene looks like this:
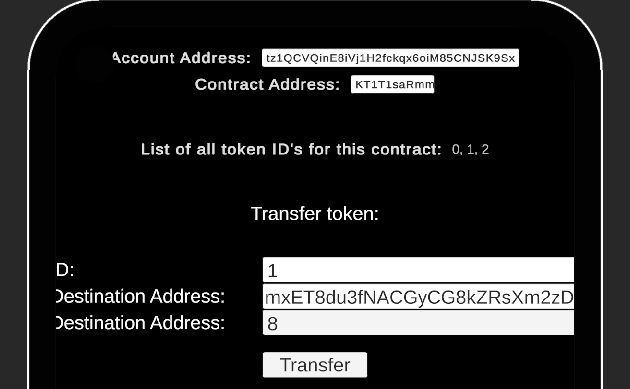
After you approve the transaction in your wallet app, the contract transfers the token to the new owner.
You can see the token owners by looking at the contract storage in a block explorer.
For example, in Better Call Dev, go to the Storage tab, expand the ledger object, and look at the entries.
For example, this entry shows that the account that ends in 2zD owns 9 of the token with the ID 1:
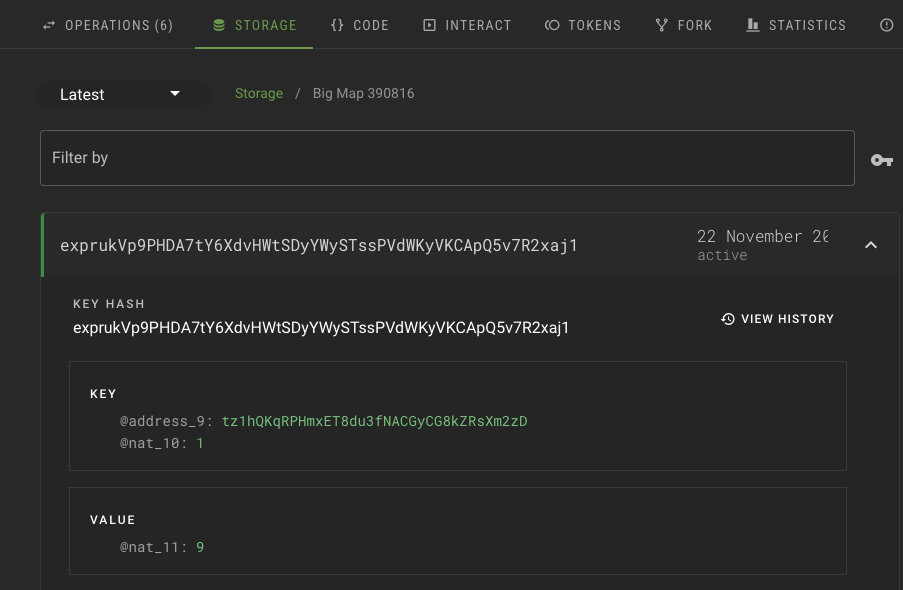
This ledger of token ownership is stored in a big-map data type, which is serialized on Tezos to save space.
IPFSUpload scene
This scene shows how to upload files to IPFS with the Pinata API.
The InterPlanetary File System (IPFS) is a protocol and peer-to-peer network for storing and sharing data in a distributed file system. Blockchain developers use it to store data such as token images and metadata.
To use the scene, select the DontDestroyOnLoad/TezosManager object and add your Pinata API key, as in this picture:
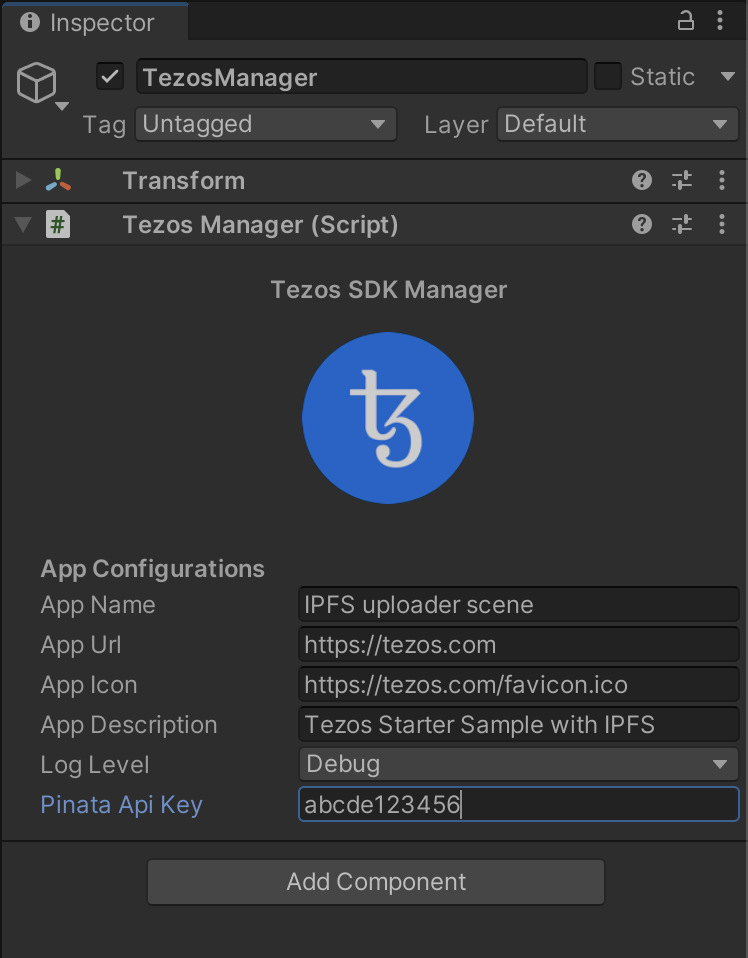
When you run the scene, it shows a button that opens a file selection window, uploads that file to IPFS, and returns the IPFS URI that you can use to access the file later.
The relevant code is in TezosSDK/Examples/IPFSUpload/Scripts/UIController.cs:
public void HandleUploadClick()
{
    if (string.IsNullOrEmpty(TezosManager.PinataApiKey))
    {
        Logger.LogError("Can not proceed without Pinata API key.");
        return;
    }

    var uploader = UploaderFactory.GetPinataUploader(TezosManager.PinataApiKey);
    var uploadCoroutine = uploader.UploadFile(ipfsUrl =>
    {
        Logger.LogDebug($"File uploaded, url is {ipfsUrl}");
    });

    StartCoroutine(uploadCoroutine);
}